Setting SQL Permissions
You will need to download the SQL Management Studio application applicable to the SQL install:
Instructions:
Note: You must have Administrative rights on the computer to install SSMSE.
Permissions on a Print Manager Plus SQL Database:
By default the Print Manager database created on a SQL server, will have the same default permissions as other databases on that SQL Server. In most cases, users within the network that are full Administrators of the SQL Server, will also have full control of the Print Manager Plus database. Below is each database type, and the recommended tool for setting permissions.
Using the SQL Management Studio Express to Set Permissions:
Since the Management Studio Express mentioned above is capable of setting permissions on any SQL Database supported by Microsoft (SQL 2016-2022), we have provided basic steps for setting permissions on the Print Manager Plus database.
1. Open the SQL Management Studio.
2. Connect to your server.
3. Browse the [Security]>Logins]
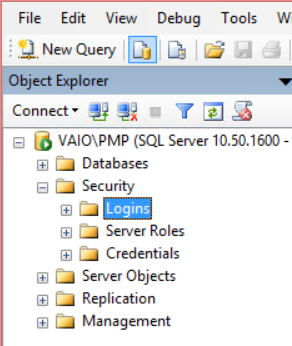
4. Right click on Logins and choose [New Login]
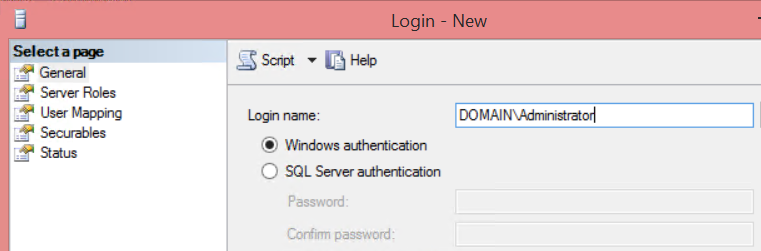
5. A new dialog will appear, click Search... and choose the Account or Group you want to grant permissions to the Print Manager Plus database. Then further down make sure Default database:,Default language: are set to PrintManager90 and English.
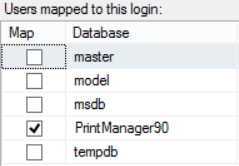
6. Once that user or group is found and selected, click [User Mapping] in the left pane.
7. Select the Check box for the database named PrintManager90.
8. Once the PrintManager90 database has been selected, within the lower pane you will see more specific permissions. For most functions, you should grant the account db_datareader, db_datawriter and db_public (by default the last option db_public is already checked).
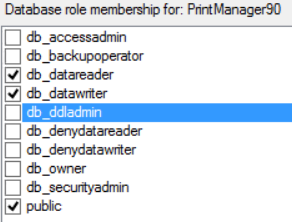
9. Click OK once the desired permissions have been set.
This will cover the general permissions required for Print Manager Plus.
Comments